ShoreTel Enteprise Contact Center Tool Bar Setup Options

As noted in a previous post, there are reasons that you might want to consider using the standard Agent tool bar. The Standard Agent tool bar enables the manipulation of an call center contacts (voice, email and chat) with an unobtrusive GUI. The toolbar can be standardized for each agent or a supervisor can allow agents to create there own tool bars. There is a setup icon that enables the ability to add or remove icons associated with different contact center functions. Again, the system administrator can “lock” this function and push out a standard Agent tool bar to assure system uniformity. In a “shift” based contact center in which different people sit at the same desk and extension at different times (e.g. Day, Night, Weekend) you can create an Agent tool bar icon that will prompt the Agent to enter their Agent ID and Extension number. In this way, the ShoreTel PBX can be setup with non-specific users, as the ShoreTel Contact Center can track usage by Agent ID.

Signing into the Agent tool bar prompts you to enter three items of information: Agent ID, Agent Extension and Email Address. The Agent Email address is only used when your ShoreTel Enteprise Contact Center is setup to route incoming email messages to the next available Agent, in a manner similar voice calls. Once logged in, there is an icon for Agent tool bar setup. There are four basic areas of tool bar setup: Telephony, ACD, Window and Other. The Telephony setup enables you to add icons for common phone features like transfer, hang-up, conference and Divert incoming call! The ACD setup enables wrap up, release and other common functions including the ability to request Supervisor Intervention. There is a Call Window, Queue monitor, Telephone manager and Desktop Wall Board in the Window setup section and currently the “other” option enable you to create an icon for launching an external application. There are also tabs for setting Preferences, Contact Information, Ring and Queue Alerts.

At the bottom of the tool bar there is a “status” line that displays information. Idle, Ringing, Connected and Held are common staus indicators, but you can also “write” to the status line. This is another advantage of this tool bar over the integrated tool bar. Similarly you can change the information that is displayed on the Queue Monitor or Agent Wall Board which are pushed out or available to the Agents. Some of this information is contained in the system defined Call Profiles, while other information is contained in the user defined Call Profiles. (Call profiles are described in detail on the www.drvoip.com instant online video training library). These options work together to create a very powerful desktop call management center, in a compact GUI. The silent video demonstrates the various configuration options and shows the easy with a customized tool bar can be created. The actual tool bar in this example, is a Supervisor tool bar in ECC 5.0 but it looks the same as an Agent tool bar!

ShoreTel ECC Integrated Tool Bar

The ShoreTel Contact Center or Enterprise Contact Center product development effort has and continues to be a “process” not an “event”.     That is what characterizes software development efforts in general.   You have to know where to draw the line and make a supportable release.     New features are always being added to any evolving product, but knowing when to package up what we have in the process, document it and be able to support it, is what characterizes a new release.    ShoreTel 4.66.07 and Version 8.1 of the ShoreTel IPBX enabled the stable, sustainable release of an integrated Agent tool bar.  (The current Release of ShoreTel ECC is Version 5 is more fully matured)   In prior releases, you had the ShoreTel Personal Call Manager (e.g. PCM)  for your PBX requirements and a separate “Agent” tool bar for your Contact Center requirements.   Today, you can implement a Contact Center with an “Integrated Agent Tool Bar” that combines both interfaces into a single GUI.  

 For those of you familiar with the ShoreTel Workgroup Call Manager will see an immediate resemblance between the new ShoreTel Integrated Tool Bar and the old workgroup toolbar.    Where it might have said Workgroup on the PCM, it now says Contact Center.   You can program tool bar options for “Wrap of Codes” and “Release with Codes”.   Under the Contact Center, supervisors get a range of options that include all of the individual components that make up the various ECC modules.   The only disadvantage that I can find at this time, is that with the standalone Agent Tool Bar, you are able to “write” to the status line of the Agent Tool Bar.  I have not yet been able to do that with the Integrated toolbar, but that is a small price to pay for having a single GUI to manage at the agent desktop.   Using the Agent toolbar alone also enable you to create an environment in which you can have a day shift and a night shift using the same telephone extension.   Changing the log in of a ShoreTel PCM is not a straight forward “user” type process and for that reason, you might elect not to use the integrated toolbar.   Otherwise, take a look, it is an amazing technology and a significant step forward for the product line.  As I said, “development is a process not an event”, so we should expect continue incremental improvements from the ShoreTel ECC team!


Memorial Day and ShoreTel Holiday Greetings Schedules!

It happens every year, every holiday at exactly the same time.  Usually, at 4PM the day before the “holiday” that everyone know was coming, your entire client base calls to ask you how to change the Automated Attendant for a holiday greeting!  One of the features that every ShoreTel System Administrator truly appreciates is a fully automagic Automated Attendant! The means it knows when it is a holiday and it changes the greeting automatically!  ShoreTel does a really great job with this feature. You can set up your entire holiday schedule for the year and then forget about it. Each Automated Attendant can have a schedule applied to it that can even include Custom or half days.  You can record a generic holiday greeting:  “You have reached at a time when we are close for the holiday”, which saves you the effort of having to record a special greeting for each holiday, but the schedule can automate the entire process and save your service organization a lot of time repeating the programming instructions!  In fact, we have recorded the instructions we have given them so often.  We have an automated holiday greeting that says “press 1 if you are calling to learn how to change your holiday greeting”!

Have a great Memorial Day holiday and remember that this is weekend is not all about life at the beach.   Memorial day is the day we honor those who did not come home;  those who gave their life in the service of their country so that we could enjoy the tremendous benefits of living in America.

ShoreTel holiday schedule

New family of ShoreTel SG voice enabled switches!

ShoreTel has a family of new media gateways. The more interesting switches are referred to as SGV switches. There is an SG50V and an SG90V that differ only in the number of FXO and FXS ports that they support. What makes these switches (i.e. media gateways) so interesting is that they have a LINUX kernel built in to support a Compact Flash Card which enables localized Automated Attendant and Voice Mail. In the world of ShoreTel’s “single image solution” we have the concept of a DVM (e.g. Distributed Voice Mail sever. The DVM are typically deployed at remote sites and, as explained in previous blog, provide for a level of resiliency (not redundancy) in your multi-site solution. More importantly, as the DVM enables Voice Mail and Automated Attendant to be localized at a remote site, it keeps these bandwidth intensive functions off your very expensive WAN.

For example, if I have a New York HQ site with users, media gateways and workgroup services; I might have a North Carolina remote site with a DVM, media gateways and users. Workgroups are currently NOT a distributed service, so any workgroup functions will require the HQ server. However, in North Carolina I can assign the users at that site to Voice Mail boxes on the DVM at that site. Callers to telephone lines that terminate on media gateways at that remote site will be answered with an Automated Attendant that lives on that remote DVM, eliminating the need to stream that media across the very expensive WAN. (Note: historically the media stream was G711 as it originated from the server regardless of the Inter-site codec. Recent release of ShoreTel enable a HQ media gateway to proxy the media stream enabling the use of the lower bandwidth Inter-site code). Should the DVM at the remote site fail, the HQ server would take over for the remote site. In this way VM and AA are still provide to the remote users.

The new SG50V and SG90V are typically used as replacements for or instead of a DVM at a remote site. The question arises as to what would happen if you added an SG50V or SG90V to a remote site under the control of a DVM? One would argue that it would make no sense to install these media gateway in that scenario. In the ShoreTel architecture it is important to note that DVM’s fail upward. For this reason we might install the SGV media gateway as a new site under the remote site. So in this example we might install a new site under North Carolina and put the SGV media gateway in that new site. Then we might move all the users at the North Carolina site to the new SGV media gateway for voice mail and automated attendant. In this way, the SVG should it fail, would have its services picked up by the North Carolina DVM; which in turn should it fail, would have all services picked up by the HQ server.

The new SGV switches are very interesting building blocks for the ShoreTel architecture and should be studied in some detail. They also might indicate a move by ShoreTel away from both Microsoft and VxWorks. This is only conjecture on my part and not based on any fact other than that we which can all observe. ShoreTel has dropped the Microsoft Access Database in favor of the MySQL database engine. Clearly this could be just a cost cutting move. However, the SGV switches, do not have VxWorks, they have a Linux kernel. Taken together these may in fact be an indication of a product road map that is moving steadily toward a total Linux based solution.  (Click here if Video does not load).

ShoreTel Linux Based Voice Switches

Deploying the ShoreTel Personal Call Manager through AD Group Policy!

Installing a ShoreTel IPBX solution is a process not an event. I have previously published a book entitled “VoIP System Planning Guide” that can be download from the DrVoIP site. This guide covers the basics for planning and managing a VoIP deployment in general and a ShoreTel solution in particular. The “devil is in the details” however and though the process can be understood, the individual tasks required to complete the process generally prove there is no substitute for hands on experience!

Every installation technician comes to that fork in the road that deals with the deployment of the ShoreTel Personal Call Manager software. Deploying the actual telephone instruments is a pure act of labor, but the Personal Call Manager is an act of commitment! Each desktop in the installation will need to be touched by someone, and I do not consider an installation complete until the Call Managers are deployed and operational. There is a component of this effort that involves interVLAN routing, (e.g. getting from the desktop data network to the phone server), but I am now focused exclusively on the actual installation of the PCM software.

There are three strategies that are generally employed to accomplish this. The first strategy is obviously to visit each desktop with a DVD or Thumb drive and load the software! For the installer this is very labor intensive and requires that the install have administrative desktop privileges or maybe even domain privileges. The second option, is to push the software out to the desktops through and email link set from the ShoreTel Director portal to each ShoreTel user. This is a bit less labor intensive, but it still requires the desktop users to have administrative installation rights to their own desktop computers. Most large IT environments do not grant this privilege to plain vanilla users!

The third option, however, has the most promise as being both labor economical while maintaining network security. We can create and Active Directory Group Policy to push the PCM out to the user and have it installed without user involvement. To do this you will need to create a few objects, modify the organization unit containing the computers and users that will be effected by the new group policy. (Refer to Microsoft Knowledge base article 816102). First you create a Distribution point; the create a Group Policy Object, assign a package and then publish your installation package. This strategy is the preferred implementation practice for deployments of any scale and installation technicians should become familiar with the basics of implementing this solution. We will publish a video on both the blog and the DrVoIP site that will demonstrate this solution.

ShoreTel Enterprice Contact Center Skills Based Routing!

The ShoreTel Enterprise Contact Center provides for “Skills Based Routing” an often confusing and misunderstood feature. It is important to note that this function might not achieve the desired result as it is only effective when there is more than one Agent available to accept a call. Lets take an obvious skill, like a Language requirement and assume that our call center needs both English and French speaking customer service representatives. We can assign a skill level to French, but we might not achieve the desired result. If we want to make sure that French callers get connected to French speaking Customer Service Agents, we might consider some other selection options.

For example we could use an Automated Attendant to select English or French and then route to the correct Agent Group. We might also use an IVR application to do a database dip, if they are an existing client, to determine their language preference. Finally, you might have separate DNIS numbers for each language required. These options will achieve the desired result, where “skills based” routing may not.

If we choose to use “skills base routing” as our best fit strategy, first we need to activate skills based routing. This is a system level option and you will find it as the SKILLS tab in entities under system. Each skill gets a value that indicates the minimum level of skill required to process the call. This means that a fluent native language speaker might get a FRENCH SKILL value of 100%. Another agent might get a 75% rating meaning that they have a language proficiency but equal to that of a native speaker. The “skill’ has a minimum value requirement of 75%.

Agents in turn are assigned two values. The first value defines the ability with respect to the requirement. In this example, someone would have to have between 100-75% as a French speaking skill. The second value would be a “preference” value. In this case the expression “preference” is an indication of how much the Agent likes to work with this skill and not your preference for selecting that Agent. This is a very important factor.

Lets assume we have Agent A and Agent B. The selection process is based on the product of the Agents value and preference subtracted from the required skill. The lower the value is most likely to be selected. Agent A has a 50% skill value and a 100% preference; Agent B has a 75% value and a 75% preference. Remembering that we have set 75% as the minimum skill required to handle this call, the arithmetic works like this: Agent A would be (75%- (50X100/100) = 25. Agent B would be (75% – (75×75/100) = 18.75 and as a result Agent B would be selected to handle this call. Again remember that the best fit is only applied when there is more than one Agent to select from! Thus skill based routing ensures that higher skilled Agents in a Group get calls before lower skilled Agents. Under heavy call volume, the skills have less of an effect, so keep this in your thinking when planning to achieve the desired result.

ShoreTel Contact Center Call Select or Agent Select

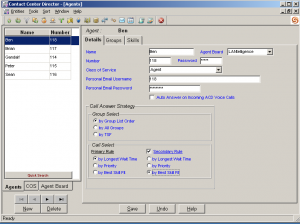
Agent Call Select OptionsConfiguring a ShoreTel ECC is better understood if we start from the Agent and work back to the caller. In the ShoreTel Enterpriser Contact Center we first define Agents whom we then assign to Groups which are generally the “destination” of a Services. Services are reached through entry points referred to as an IRN or Internal Routing Numbers. The IRN is connected through the PBX via TAPI to the DNIS dialed by the caller. Services can also have Destinations of Scripts which might be an IVR application or database dip to obtain additional customer or routing information.

Agents have both a Call Answer Strategy and a Call Select Strategy. We can search for an Agent based on which Agent has been idle the longest; Terminal, Circular or Best Skill Fit. This is defined at the Service level as “Agent Search Criteria”. What happens, however, if an Agent is a member of multiple Groups and an opportunity exists to have a called present to that Agent from all the Groups that the Agent is a member of? How do we determine which call from which Group should be presented to the Agent? This is where the “Call Select” strategy kicks in. We can assign a primary rule and a secondary rule. The rule can then define if the Call should be selected by the Longest Wait Time; by the Priority of the Call (set as the result of a previous Script or as assigned by the IRN when the call entered the system); and lastly by the “Best Skill Fit”.

Skills-based routing will be discussed in a later blog, but suffice it to say that the Enterprise Contact Center has a superior feature set at a price point that puts this contact center in its own product space. Knowing how to implemented the Call Center should not be left to OJT personnel! Get an implementation team that knows the difference between a ‘dress rehearsal’ and a ‘take’.

VoIP and SRST/AES Encryption!

Encryption of VoIP traffic was, for some of us a humorous concept. I remembered as a young development professional how much fun it was to use a packet sniffer to capture the bosses packets and reassemble his email over the LAN. Years before that when I worked at the phone company as a central office test engineer, it was not uncommon to find an interesting phone call and plug it into the over head paging system to provide entertainment for the late night test crew. There are times I still think the concept of encryption on VoIP is humorous, but it is becoming less funny all the time as we move toward end to end VoIP with no TDM at all in a world populated by terrorists and other evil doers. In any VoIP environment today, you can at some point use the usual tapping tools to capture a phone call as it hits the TDM gateway and is converted from VoIP to traditional analog or digital signals. From an induction coil to a line mans butt set, you can still intercept a VoIP call as it crosses the TDM boundary.


Now that VoIP is being used end to end, we do need to have a mechanism for encrypting at least the media stream. Today we generally do that with SRTP and IETF standard in combination with AES. AES or the Advanced Encryption Standard was adopted by the US Government and comprises three block ciphers: AES 128, AES 192 and AES256. Each AES cipher has a 128 bit block size with key sizes of 128, 192,and 256 respectively. This standard has generally replaced the former Data Encryption Standard or DES. It is important to understand the difference between encryption and authentication. Determining that a signal is “authentic” and originated from a source we believe to be authentic, and encrypting the contents of that communication are two very different issues. Media authentication and encryption ensures that the media streams between authenticated devices (i.e. we have validated the devices and identifies at each end) are secure and that only the intended device receives and reads the data. We need to encrypt both the media (i.e. the voice) and the signaling information (i.e. the DTMF). In most VoIP systems today, SRTO or secure RTO is implemented to assure media encryption. Understand that this encryption is not passed through to the TDM network, so once the media stream leaves the VoIP environment it is subject to eavesdropping.

Clearly as we are now able to employ VoIP end to end, SRST/AES encryption has very powerful ramifications for both the good guys and the bad guys!

How to get your iPhone running SIP on your ShoreTel IPBX!

If you are and iPhone aficionado, you absolutely want your iPhone to work  on your ShoreTel IPBX! I recently downloaded VeNetCorps SipPhone fromt the iPhone App store! There are several SIP phone apps at the store, but most have a pre-programmed domain name for the sip registration proxy server. If you want to use your own SIP proxy there was no easy way to change the IP address so you had to hack your DNS to get it to point to the ShoreTel SIP proxy. Also you need at least iPhone firmware 2.2 as previous versions had WiFi connectivity challenges that negatively impacted the potential for using a SIP softphone. After the iPhone WiFi acquired an IP address, if you attempted to ping the address you would see latency in excess of 300ms. With version 2.2 this issue has all but become unnoticeable. As with any SIP extension setup on ShoreTel, you need to assign sip extension proxy resources on a ShoreGear switch. In the sites section of the ShoreWare Director, make sure you assign a virtual IP address. This is the address you will use for your “domain’ when you setup the Iphone SipPhone. Clearly you will need a User setup with a SIP phone password defined in the individual user section of the ShoreWare Director.

Clearly the assumption here is that you have a WAP that your iPhone can connect to. Also that that wireless connection can route to your ShoreTel network! Once the ShoreTel SIP user, virtual IP address and proxy resources are configured it is time to configure your iPhone SipPhone! After you down load the application and tap to activate the application you will get a screen that lists the options: Dialer, Recent, Contacts, Accounts and Settings. Hit the Accounts tab and you will then EDIT a new SIP account. To get this app to work on ShoreTel you need to enter only three values. First you need to enter the domain name, we have previously defined in the ShoreTel Director as the Virtual IP address. The Username and password are also as specified in the individual user setup in ShoreTel. Hit the DONE tab, and the phone should register and you can make and receive calls from your ShoreTel. I put together a video clip that covers this so you can see that it accutaly works! The video suggests that you enter the user name, but if you want to call the iPhone from a ShoreTel extension, enter the user’s extension number instead.  This was just a fun project and latency on the iPhone WiFi is still a challenge for SIP phone usage.  I suspect that Version 3.0 of the iPhone will fix this small issue, but it was a blast trying it out!  Enjoy!


Add your iPhone as a ShoreTel SIP extension!

ShoreTel ECC Abandoned Call – Call Back and Dial List applications!

The ShoreTel Enterprise Contact Center has several features that are often confused: Abandoned Call, Call Back and Dial Lists. Thought the features are somewhat similar, they work in different applications and not all for these features are available in the basic Contact Center. The ShoreTel ECC uses the concept of a service to encapsulate the handling of an incoming phone call. Generally the Service includes Groups, which include Agents, but groups can encompass other call actions. For example, a Service can contain a “script” that prompts the caller for DTMF input or calls on a SQL query to search an external database The Service also provides instructions for how queue messages are to be played to the caller.

Abandoned Call back enables the system to recognize that a caller was in queue but hung up before being serviced. The ShoreTel ECC can capture the Caller ID and then return the call! Typically an Agent is “reserved” before the outbound call is placed, the call is dialed and then transferred to the agent. It is also possible to play a pre-recorded message to the called party before the call is transferred to the agent, but there are reasons that you might not want to do this.

Let’s make a modification to our queue service to hold the caller and after a period of time, offer the caller an option to bail out. This is where the “Call Back” feature comes in. ShoreTel enables you to create a “script” that can not only prompt the caller to enter a return telephone, but also offer the caller the option to schedule a particular date and time for the call back. This is a very useful option for callers that have a “help me, teach me, show me” request but not at a level of urgency that would inspire them to sit on hold for an extended period of time.

The “dial list” feature of the ShoreTel ECC usually works in conjunction with a database dip. Lets take a typical credit and collection application. The ShoreTel ECC can access a database of delinquent clients, obtain the phone number of the client, dial the client and pass that call to an Agent that has been reserved by the system to handle this type of call. The system also provides for the option of updating the client record with a completion status for further database processing.

The ShoreTel ECC is an exciting application that can be used in the small to medium sized “contact center” environment to enhance functionality, increase productivity dramatically scale the functionality of an already powerful VoIP solution. (Note ShoreTel ECC and Contact Center have been used interchangeably in this blog! The ShoreTel Enterprise Contact Center is a superset of the ShoreTel Contact Center and feature content may vary between the two versions).